Redshift Data Loading Simplified with Schema-On-Read ELT
Redshift Data Loading Simplified with Schema-On-Read ELT
Redshift Data Loading Simplified with Schema-On-Read ELT
By now, it’s become pretty clear that Amazon Redshift is becoming the preferred data warehouse solution due to a number of factors. One factor may be its compatibility with Postgresql, enabling talent with existing SQL skill sets to immediately handle and enable access to massive volumes of data; another may be its “cloud-ability”; that is, Redshift’s non-requirement of dedicated software and hardware, as well as extra implementation effort.
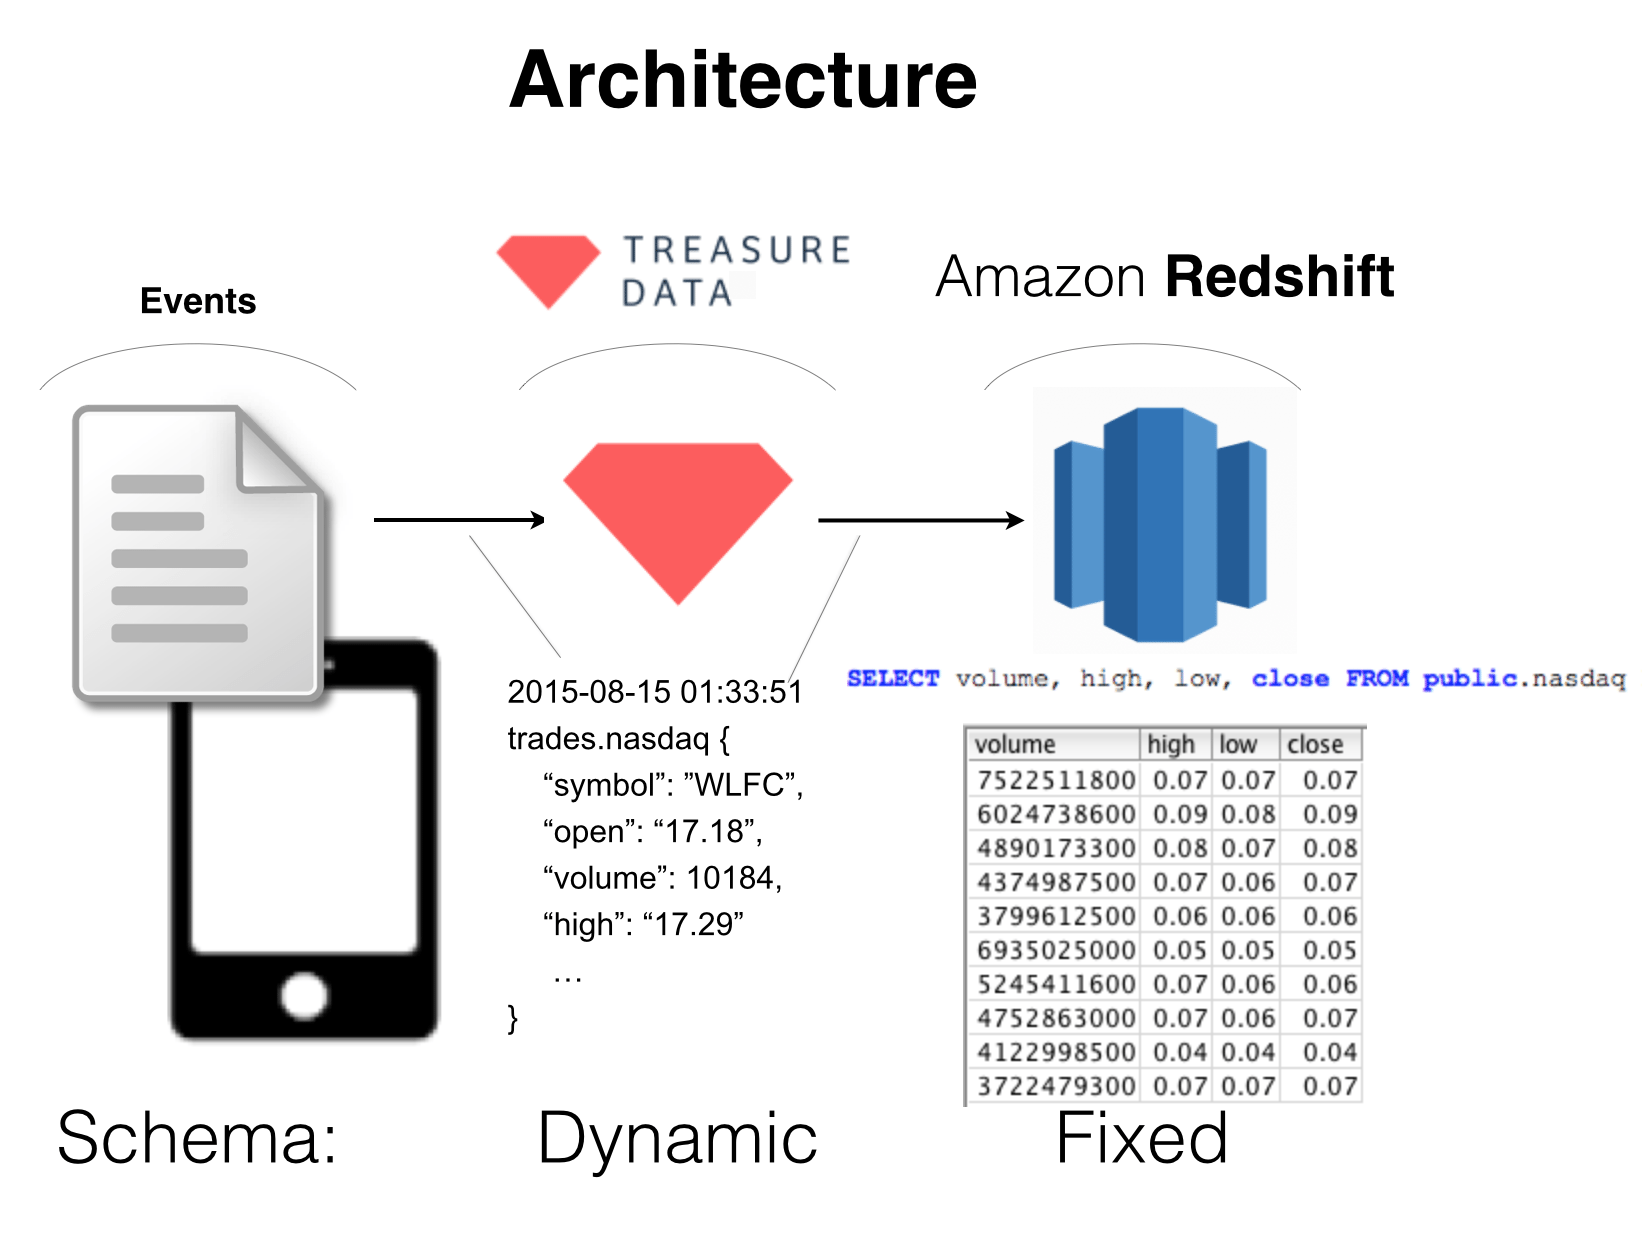
In any case, one of the challenges of onboarding with Redshift is being able to ingest semi structured data, and at volume, directly to Redshift from a semi-structured or multi-structured data source.
Treasure Data is an excellent ingestion point for such data to be routed to other systems, including Redshift.
In this post, we’ll walk through an easy, ramp up scenario, using only Visual UI tools that sets up an Amazon Redshift instance and ingests data to this instance via Treasure Data; that is, we’ll use the Treasure Data console to export our query results to Redshift.
In future posts, we’ll cover the complete data ingestion pipeline from S3, Postgresql, MySQL (and more) to Redshift.
For a quick TLDR, refer to the video.
- Set it all up
- Create and launch your Redshift cluster
- Run a Presto Query in Treasure Data Console to export results to Redshift
- View the export (via SQLWorkbenchJ) on Amazon Redshift
- View the SQL transactions on Redshift Console
- Conclusions
Set it all up
To get started, you’ll need a few things:
- An AWS Account;
- SQL Client drivers and tools;
- An inbound ingress rule allowing traffic to your cluster.
The Amazon Docs should walk you through most of the steps needed here. I’m running SQL WorkbenchJ on the Mac with Amazon Redshift (com.amazon.redshift.jdbc41.Driver) installed.
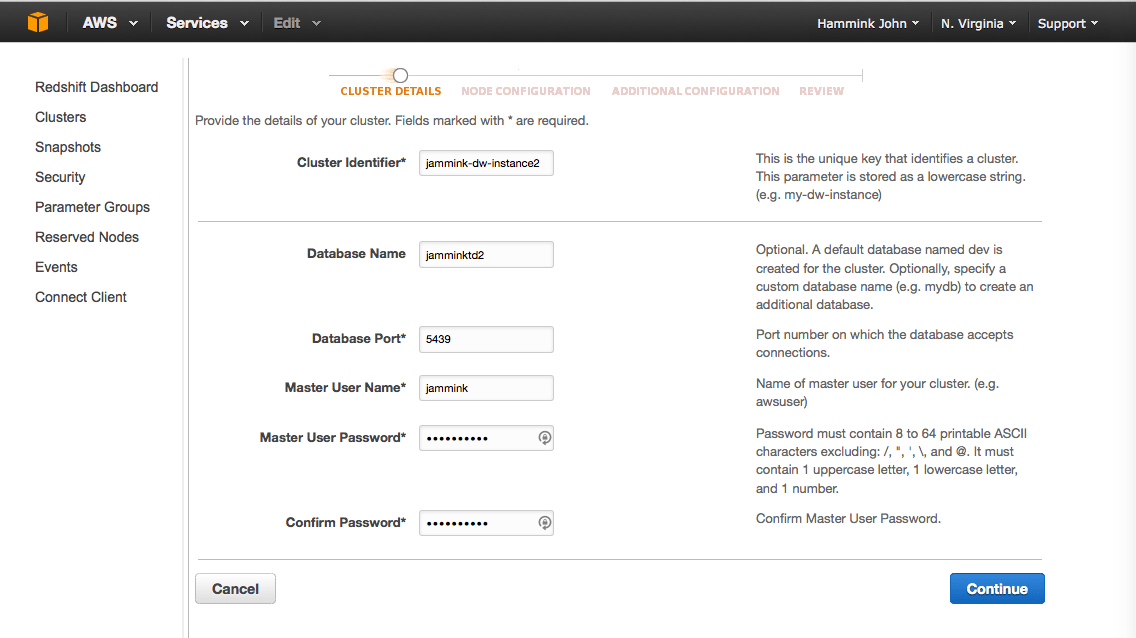
Create and launch your Redshift cluster
Here are a few key points:
- In AWS=>Redshift=>Clusters, click the
 button to start the process.
 - Be sure to write down your Cluster Identifier, Database Name, Database Port number (Amazon will assign this by default), your Master User Name and your Master User Password, before you click “Continue.”
- In the “Node Configuration” screen, Node Type “dc1.large” default is the least expensive Node type.
- On the “Additional Configuration” screen you can choose whether or not to make your cluster to be accessible from the public internet. Choose “Yes”, and allow Amazon Redshift to provide an EIP for you.
- Also on the Additional Configuration screen, make sure you have created a VPC security group that allows inbound IP traffic, and associate your cluster with this group.
- On the Additional Configuration screen, you can choose to encrypt your database. In production, this is recommended, but for the purpose of this demo, I have skipped this step.
- Finally, review (and save somewhere) your Cluster Properties and Database Configuration before you launch the cluster.
Run a Presto Query in Treasure Data Console to export results to Redshift
This is the key part where we ingest data into Redshift using TD console.
For this exercise, we’ll use the sample_datasets that come with Treasure Data console.
We’ll use the nasdaq table; we’re interested in the top 10 trades (high, low and close) by volume.
- In the “Database: ” dropdown, select “Sample Datasets”.
- In the “Type: “ selector, select “Presto”.
- Next, enter the query itself:
SELECT volume, high, low, close FROM nasdaq ORDER by volume DESC LIMIT 10
- In the Host field, enter the same text (including port number) that appears after “Endpoint” on your Redshift cluster page. For example, mine was:
- Enter your Username, Password, Database and Table names as you have configured them on your Redshift instance. Use “replace” mode if you want to overwrite the data (Note: a good way to “clean” your Redshift database is to run the query above, instead setting “LIMIT 0”. Otherwise, use “Append”.
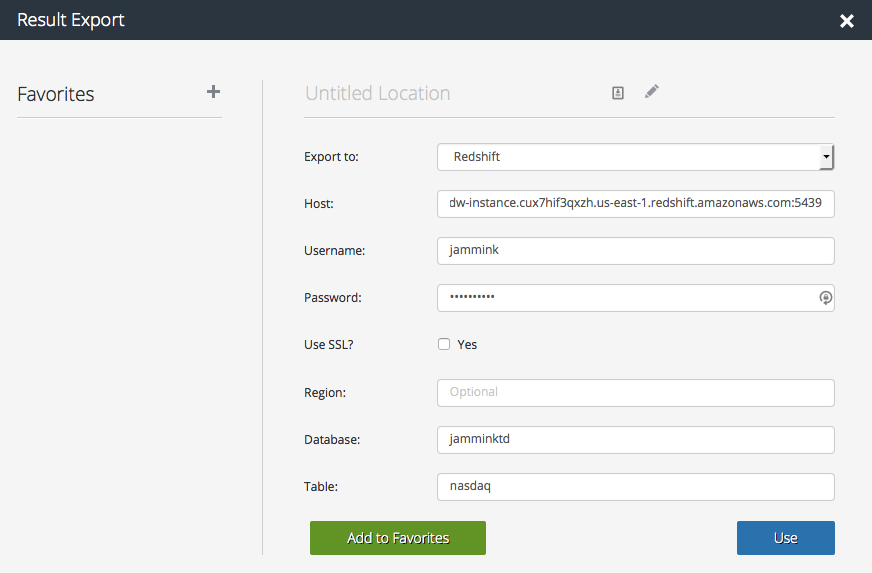
- Finally, click “Use”. Then run the query.
View the export (via SQLWorkbenchJ) on Amazon Redshift
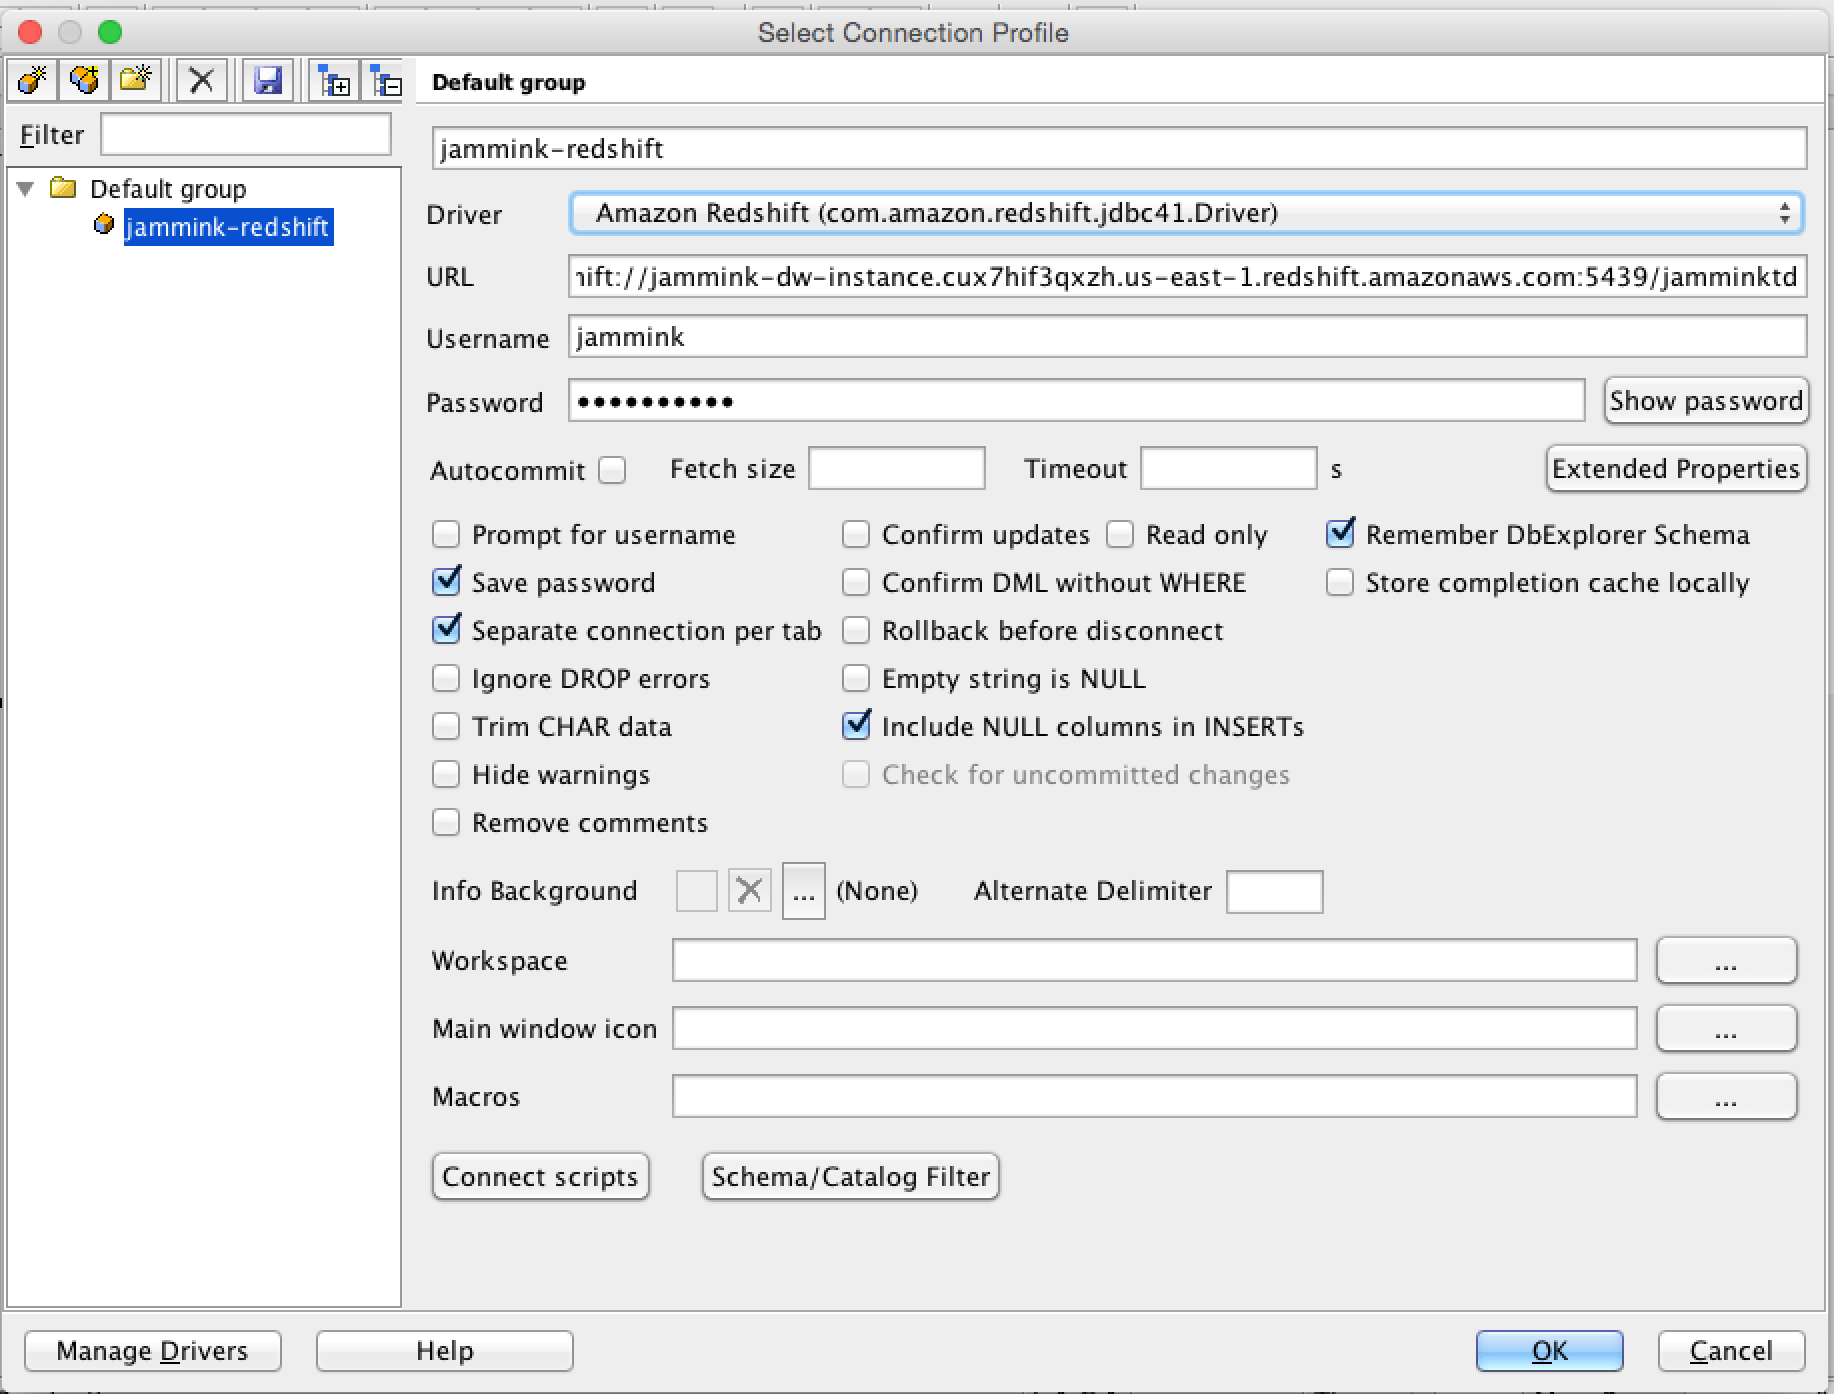
Previously, you’ve configured your SQLWorkbenchJ with the above connection. A few points of note:
- The URL that SQLWorkbenchJ starts with “jdbc:” and includes the full redshift URL, including port number, and ends with the database. So, for example, mine is:
jdbc:redshift://jammink-dw-instance.cux7hif3qxzh.us-east-1.redshift.amazonaws.com:5439/jamminktd
- The Driver should be com.amazon.redshift.jdbc41.Driver
- Once you’ve configured that, plus your usename and password, click “OK”.
- You can view the data you’ve imported to Redshift by clicking your table row in the left pane, and the “Data” button above the right pane.
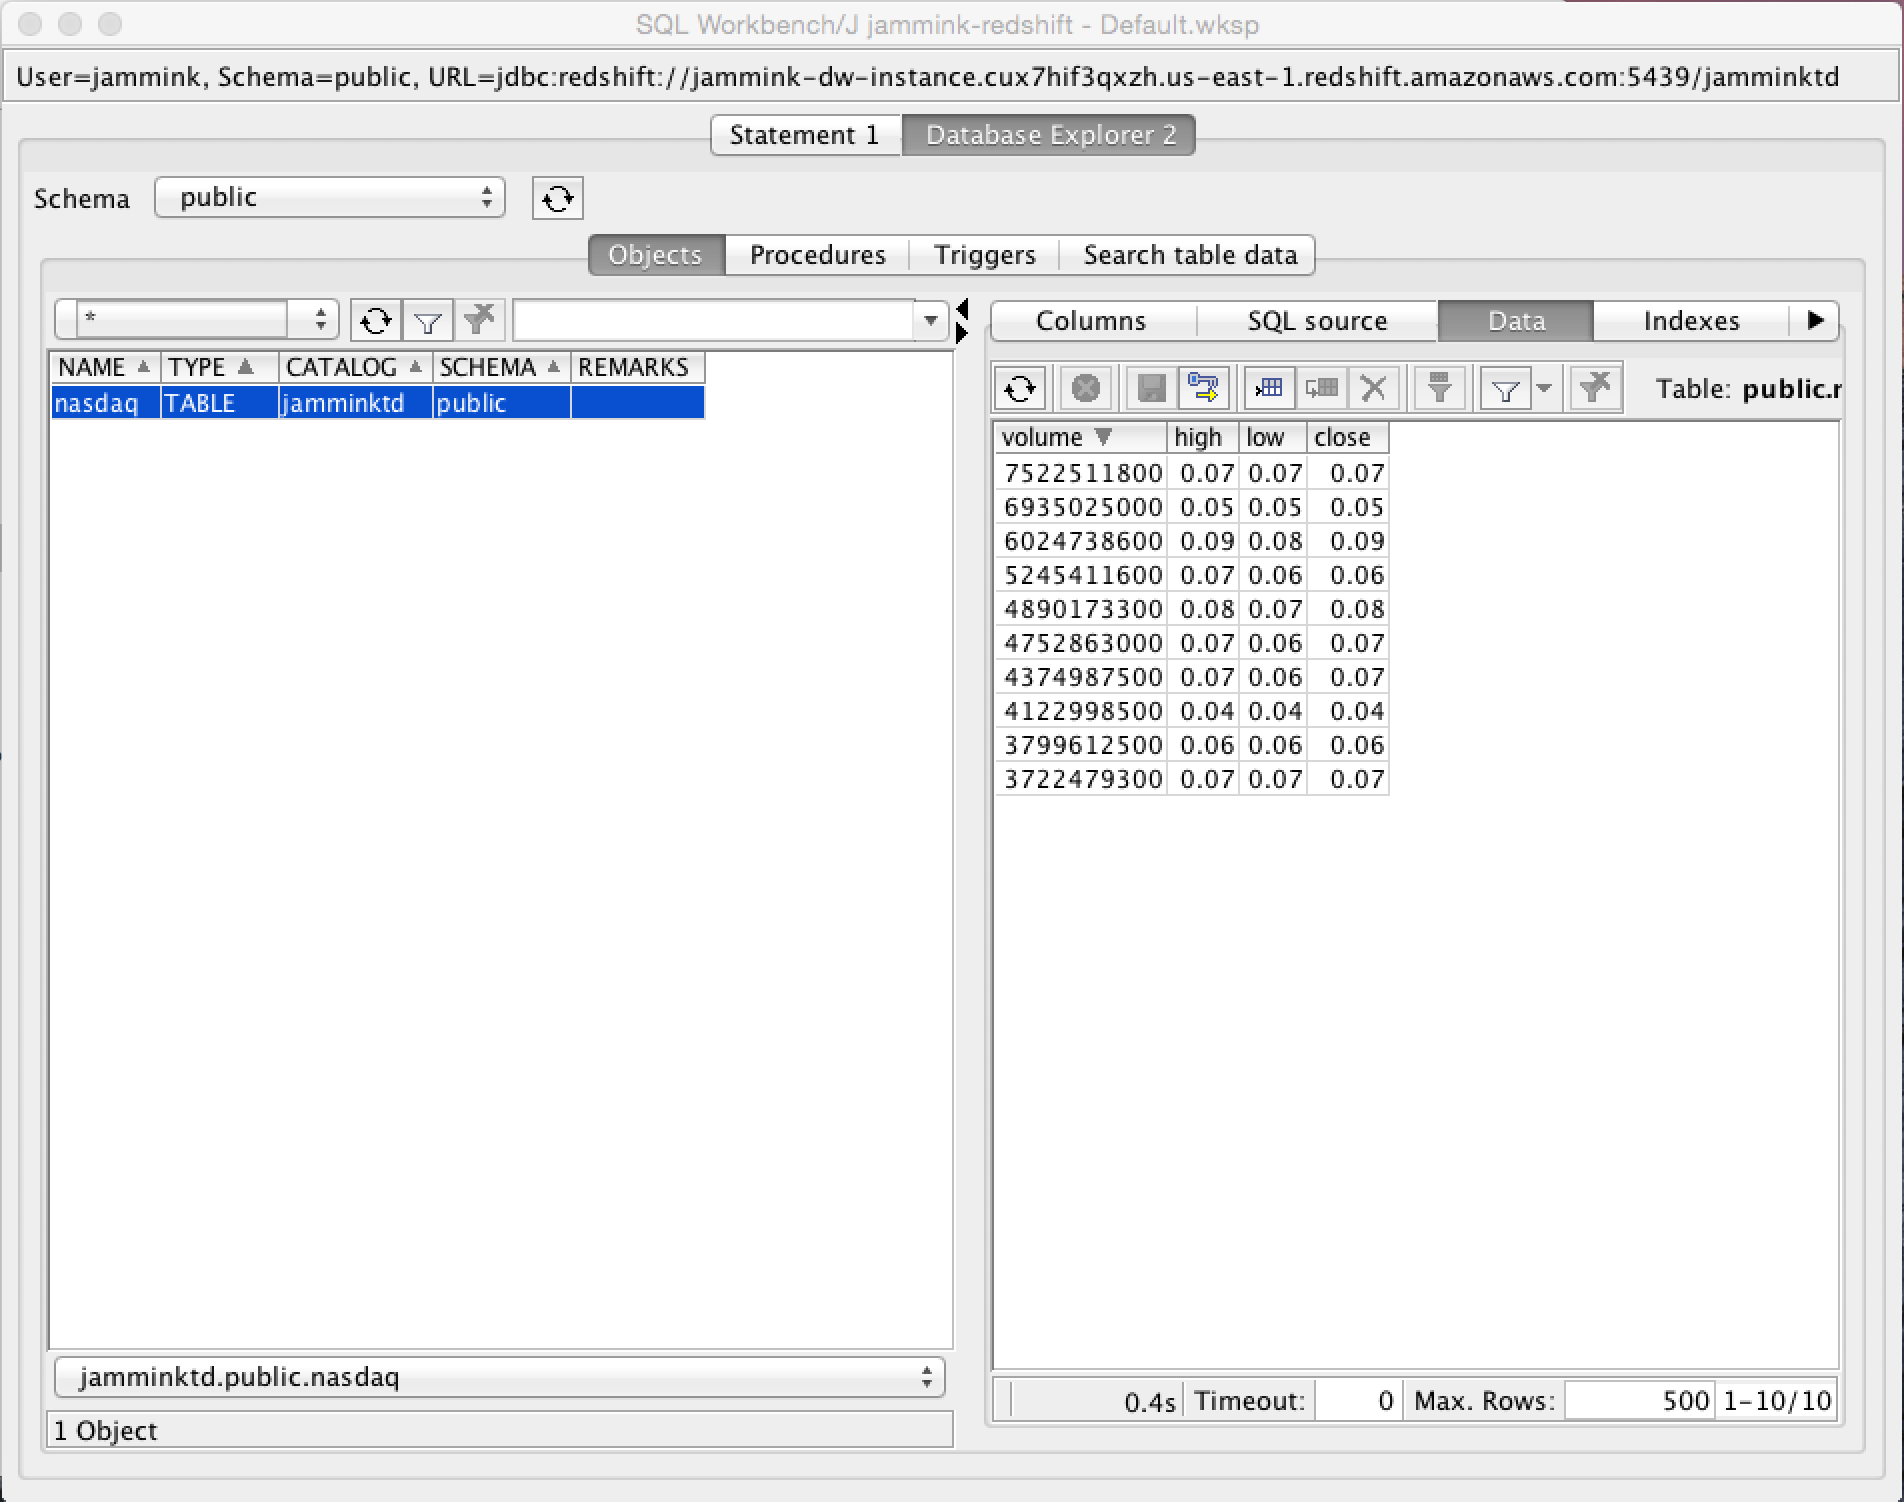
- Voila! The top 10 trades by volume.
View the SQL transactions on Redshift Console
Any queries you run additionally from your SQLWorkbenchJ can also be seen in query view on your AWS instance. To view them, click your cluster name under Redshift Dashboard => Clusters, and select the “Queries” tab.
Conclusions
As you can see it’s relatively easy to set up Treasure Data to funnel data into a Redshift instance. The trick is remembering all of the parameters you need to set when making the connection, but there actually aren’t that many. Treasure Data’s strength is dealing with semistructured data coming from many sources; with Amazon Redshift as your data warehouse on the backend, you can truly leverage the best of both.
If importing data into Amazon Redshift – easily – is something you need to do, follow the link below and request a quick tour of our product!