How to Succeed at Importing XML to Just About Anywhere (without converting to JSON first)
JSON is everywhere. Nowadays, almost any emerging data ingestion framework or REST API endpoint uses JSON as a data transfer format. In fact, many will argue that since data is stored in records and arrays (JSON) rather than trees (XML), and object-oriented languages are more familiar with the former, that JSON is the hands-down format of choice.
Of course, aside from backwards compatibility, there may be other reasons you need to go with XML. One such scenario is when you want to share documents (including images, charts, and graphs) and want to capture your data format along with the data itself. Also, you may have a scenario where you need to integrate a variety of formats, and JSON deliberately supports fewer of these. That means that XML is way more extensible. Both formats (although XML is technically a language) are neck-and-neck in other areas, such as simplicity and interoperability, to name a few.
If you’re still using XML, for whatever reason, you may need to make a few additional tweaks to get almost any XML imported to Treasure Data (or any other system, for that matter) to add to your analytics mix. Luckily, there’s a tool for this – it’s called Embulk.
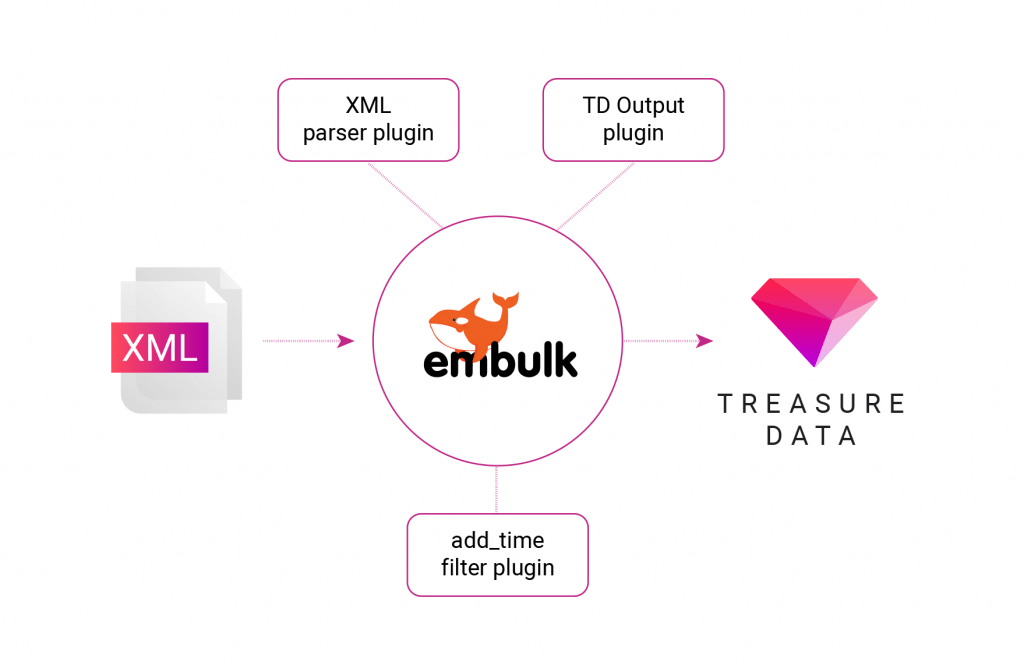
If you’ve ever used Embulk to import or route data before, you’ll generally find that it works out of the box with the XML parser plugin for Embulk. In one recent customer case, however, we found that the timestamp data type was causing our parser to throw an error.
The fix? We added the add_time filter plugin to manually parse this part of the XML. This allowed us to do two things at once:
- Define our timestamp element in our input XML as a ‘string’ type;
- Inject a timestamp value into the input.
Setting up your own XML ingestion toolchain
Let’s look at how you can set up your system to run Embulk locally and parse XML into Treasure Data. (We’ll assume you’re running on Linux or Mac. For Windows, go here.)
Setting up embulk locally
- Download it, make it executable, and add it to your path (Note: in the example below, replace ‘|’ with ‘>>’):
$ curl --create-dirs -o ~/.embulk/bin/embulk -L "http://dl.embulk.org/embulk-latest.jar"
$ chmod +x ~/.embulk/bin/embulk
$ echo 'export PATH="$HOME/.embulk/bin:$PATH" | ~/.bashrc
$ source ~/.bashrc
- Using embulk’s own install mechanism, install the necessary plug-ins:Treasure Data output plugin:
$ embulk gem install embulk-output-td
XML parser plugin:
$ embulk gem install embulk-parser-xml
add_time filter plugin:
$ embulk gem install embulk-filter-add_time -v 0.1.1
You are now ready to import your XML data.
Importing your XML data
Importing is now pretty straightforward, and works pretty much the same as all of our connectors – which are based on Embulk. As when importing from other data sources, you’ll create a seed.yml (configuring your Master API key, your input as file, and output to Treasure Data), preview your import, and, finally, run the import. Let’s look at these steps in more detail.
- Create a seed.yml. This is your main configuration file for embulk and determines how embulk will access your data source, how it will parse your data, and where it will route the data.In your configuration, you’ll need to ensure you’ve set your input as file and, output as td. Also, make sure that you’ve configured the add_time filter correctly.While your scenario may vary (and your schema most definitely will!) we’ve included an example configuration below. (See Embulk documentation for more info.)
config: in: type: file path_prefix: /Users/popeye/Demo/xml/files last_prefix: parser: type: xml root: measurements/measurement/measurement_data/ schema: - {name: record_id, type: string} - {name: date_time, type: string} - {name: measurement_point_name, type: string} - {name: measurement_point_description, type: string} filters: - type: add_time to_column: {name: time} from_value: {mode: upload_time} out: type: td apikey: ~Put your Master API key here~ endpoint: api.treasuredata.com database: ~DB Name~ table: ~table name~ #time_column: date_time - Verify the seed file and preview the import:
$ embulk preview seed.yml
This step will tell you if there is anything broken in your configuration as well as give you a look at what your database table will look like in Treasure Data.
- Load your data.
$ embulk run seed.yml
While we’ve used Treasure Data as our landing point (and we hope you will too…) Embulk can actually be configured to import data to any number of data destinations.
Nonetheless, if you want a data analytics pipeline in the cloud without the hassle, sign up for our 14-day trial!
A much-deserved thanks goes out to Vinayak Karnataki and Muga Nishizawa for their valuable help on this case.
