Supercharge your Salesforce Data Search Efforts with Treasure Data and Elasticsearch
Supercharge your Salesforce Data Search Efforts with Treasure Data and Elasticsearch
Supercharge your Salesforce Data Search Efforts with Treasure Data and Elasticsearch
Elasticsearch is growing by the day, and its users include companies like Ebay, Verizon, Reuters, The New York Times, Microsoft, and Facebook (and those are just a few of the bigger ones!)
Elasticsearch benefits not just those looking for text search, but those looking for instant insights and business intelligence from their textual and unstructured data. You might see Elasticsearch implemented as part of a lambda architecture where Elasticsearch is used as the real-term, low-latency data store and visualization layer – and Treasure Data is used for long term historical data storage. Or, you might see Elasticsearch search used on the backend where data is normalized and formatted in another system (like Treasure Data) before being exported to Elasticsearch.
Because Elasticsearch is easy to get started and open source, it’s become a popular analytics tool among developers well beyond data engineers and infrastructure engineers.
But how about business users? Isn’t it time for business users to take advantage of Elasticsearch’s flexible analytics capabilities? In this blog we’ll show you how to import Salesforce data into Elasticsearch using Treasure Data.
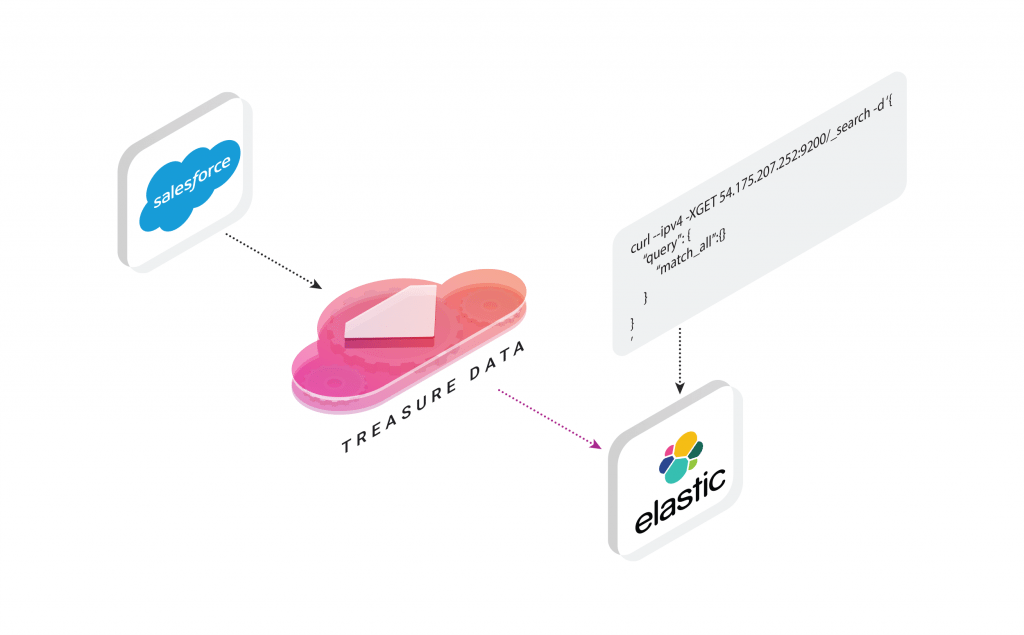
I should note that Salesforce is just one of many data sources Treasure Data supports, and by tweaking my workflow a little, you can import data from a variety of data sources (See here for some of the 300+ integrations supported on Treasure Data). We’ll also touch on configuring AWS, EC2 (which we’ve used) and Elasticsearch to play nicely with your big data.
Setting It All Up
EC2
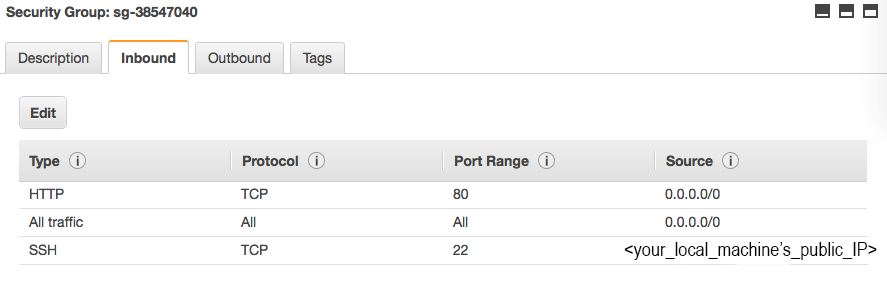
For our tutorial, we’ve set up Elasticsearch on an EC2 instance running on AWS. Here are some guidelines to follow (and gotchas to avoid):
- Make sure you have top level IAM rights on your account and can grant relevant permissions.
- Create a new EC2 Instance running Ubuntu 14.04. Make note of the following values:
- Public DNS
- Private IPs
- Public IP
- Assuming the instance is for testing (not production!) add the following inbound rules to the security group associated with your EC2 instance (note that you only need SSH access directly from your machine):
Elasticsearch
- Run the following commands from your EC2 console to download and install the latest version of Elasticsearch:
- Next, you’ll want to edit your Elasticsearch configuration:
- Change the following settings as shown:
Here are some additional commands you might find useful
- Tailing Elasticsearch log for troubleshooting
- Restarting Elasticsearch
Ingesting Data from Salesforce
Go here for prerequisite steps to connect Treasure Data to Salesforce.
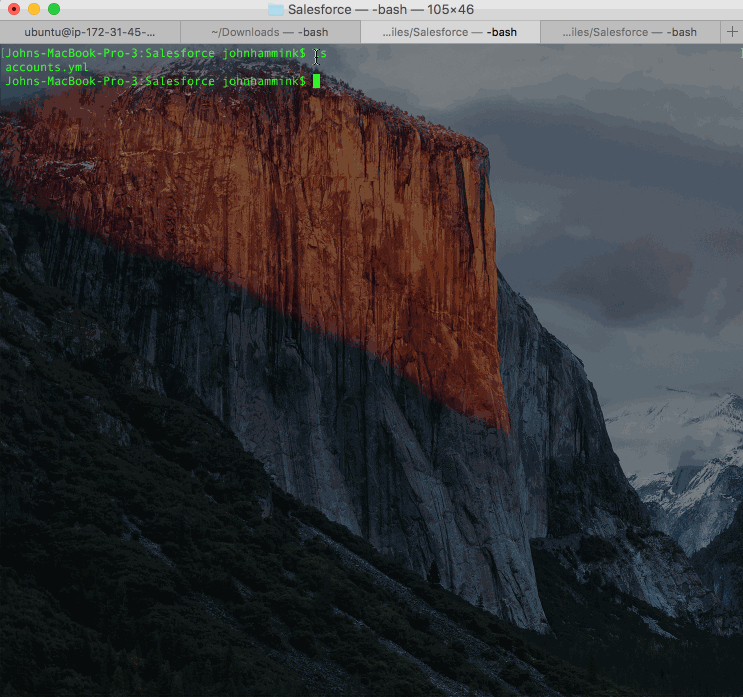
- Create an accounts.yml file:
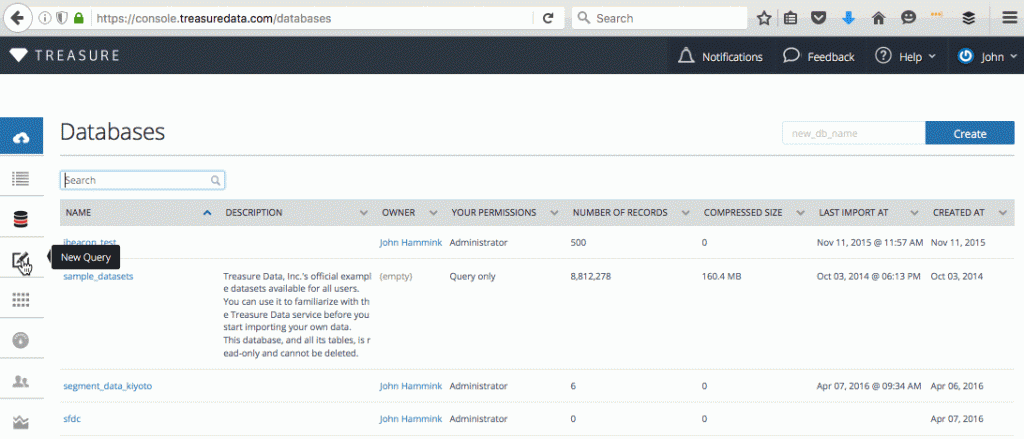
- Create your database and tables on Treasure Data
- ‘Guess’ the format of the incoming Salesforce data:
This step enables you to have a look at your data and make any adjustments, if necessary.
- Load your data into Treasure Data:

Querying Data in Treasure Data and Exporting Results to Elasticsearch
Once your Salesforce data has appeared in Treasure Data, you can query your results into a format you like, and export the results to Elasticsearch.
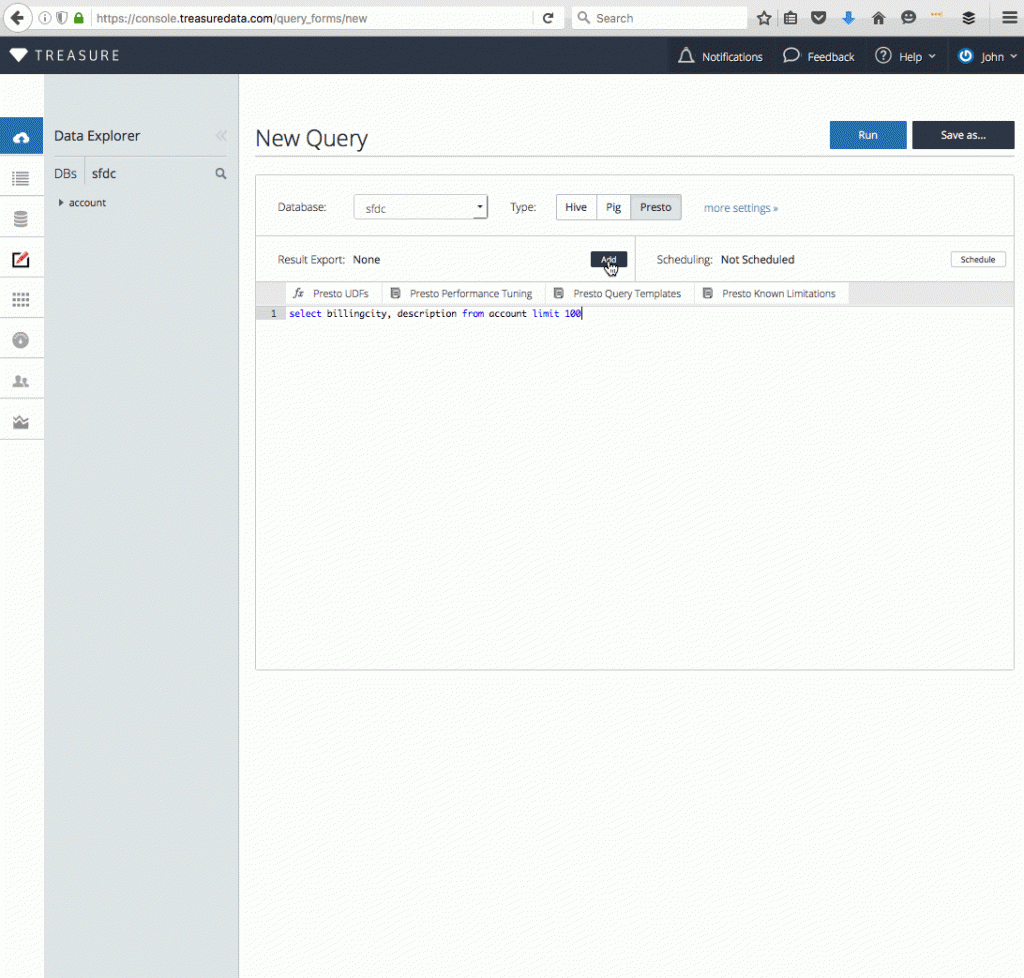
For our purposes today, we’d like to map our billing city to descriptions of the leads, and export 100 of the results to Elasticsearch for text search.
- Open the Treasure Data Console query editor and enter the following query:
Click the GIF to view the animation.
- Under ‘Result Export’ click Add, and enter the following information:
Export to: Elasticsearch
Mode: replace/insert
Nodes:
Cluster Name: elasticsearch
Index: descriptions_by_city
Type: details
Click ‘Use’. - Click the ‘Run’ button at the top of the query window.
Click the GIF to view the animation.

Your Salesforce data will soon be ready to query in Elasticsearch!
Querying your Exported Data in Elasticsearch
Now that your data is imported into Elasticsearch, you can run some simple curl queries on Elasticsearch from your remote host.
- Count your number of records:

You should come up with 100 records as that’s what you’ve limited your query to in the previous step.
- Query all of your records:
- Query your records only in ‘descriptions_by_city’ index which was created on the fly by Treasure Data when you ran the result export:

Next Step: Combining Salesforce Data with other Data Sources
Now that you can export your Salesforce Data (or any data from Treasure Data’s 300+ supported integrations) to Elasticsearch, why not ask yourself where your data pipeline can benefit from a fast, well-supported text search?
We believe that Treasure Data’s universal data connector gives you much more freedom and choice with your data ingestion and analytics efforts. Check out our product or request a demo today.